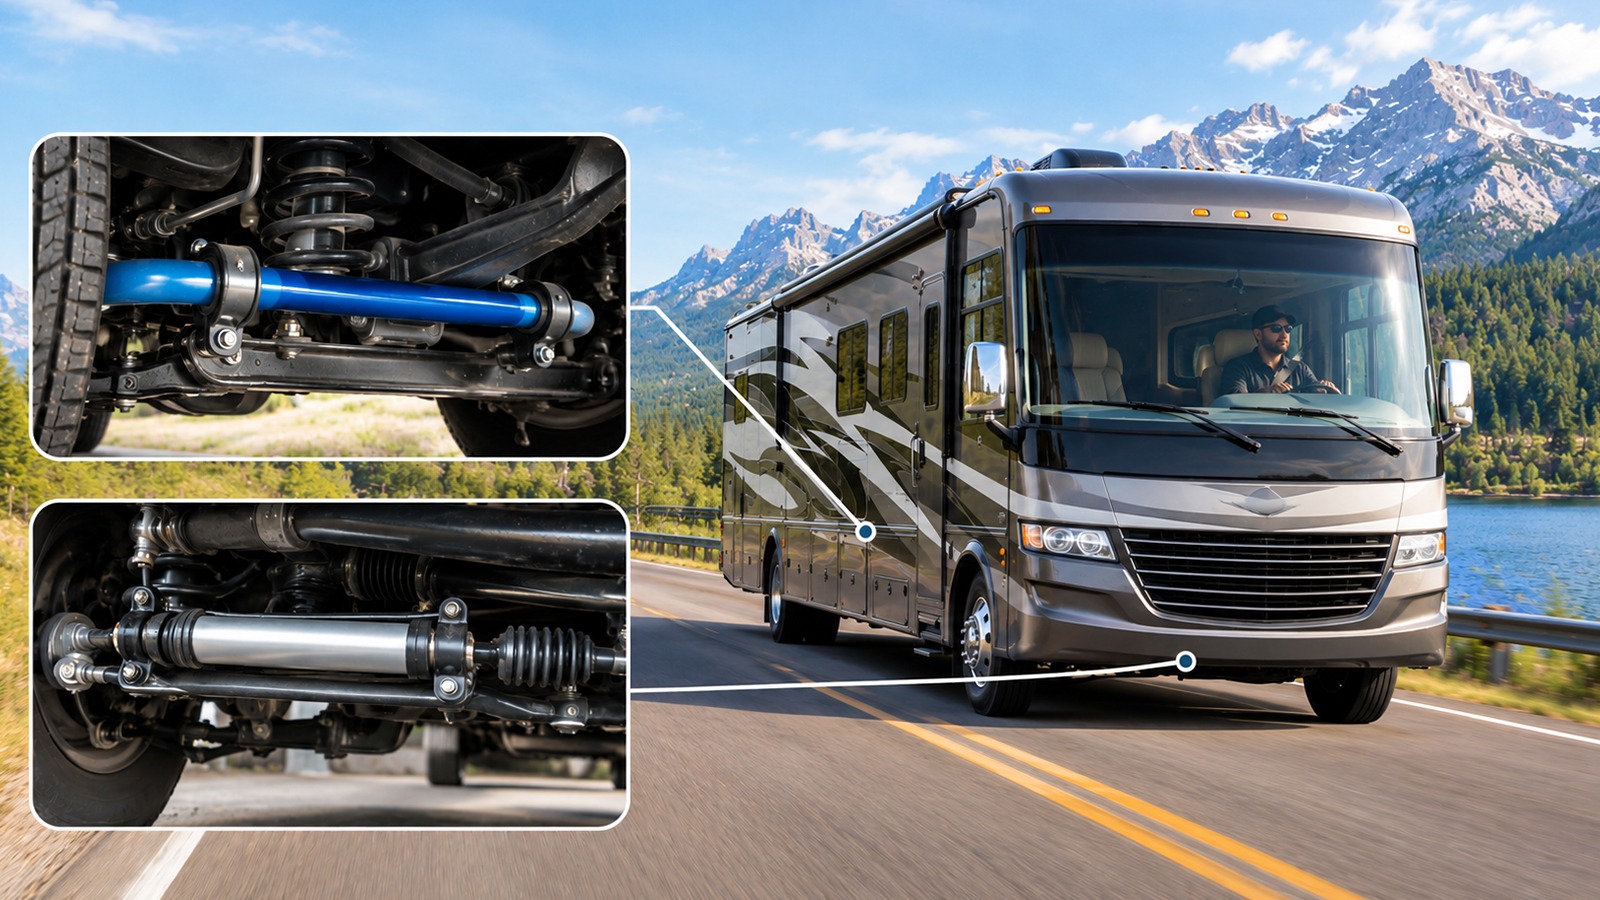
An RV road trip is best experienced without the annoyance of rattling panels, engine noise, or wind whooshing past your windows.
Fortunately, you can substantially dampen or eliminate most common RV noises with butyl mats to absorb panel vibrations, sound shields to deaden airborne noise, and suspension components to reduce steering-device kick.
It’s important to distinguish what kind of noise you are experiencing; butyl mats control panel vibration, sound barriers reduce airborne noise, and steering stabilizers eliminate undesired movement in the steering system.
Quick RV Noise Troubleshooting Checklist
| What you hear or feel |
What to check first |
| Metallic rattling over bumps |
Cabinets, trim, and loose fixtures |
| Engine roar inside the cabin |
Engine cover, floor, and sound insulation |
| Wind whistling at highway speed |
Window, entry-door, and slide-out seals |
| Repeated bouncing after bumps |
Shock absorbers and suspension |
| Steering wheel movement |
Tires, alignment, and steering components |
| Water pump vibrating through cabinets |
Pump mounts and contacting water lines |
Use these clues to identify the source before purchasing parts. The solutions below describe ways to minimize noise and vibrations inside an RV without spending money on upgrades that do not solve the issue.

1. Choose the Right Materials for RV Soundproofing
One of the most common RV soundproofing mistakes is assuming one single product to eliminate every noise. A quiet cabin requires targeting two fundamentally different acoustic problems: structure-borne vibration and airborne sound.
Butyl Mats for Structure-Borne Vibration
When your RV hits some rough roads, the thin skins of metal and fibreglass will vibrate causing the inside of your RV to be filled with a tin-can type sound. This can be solved by using sticky butyl based damping mats such as Kilmat or Noico or Dynamat. These add mass to the flexible surfaces.
Butyl mats don’t offer the same amount of airborne-noise reduction that you would expect from a true sound barrier. Butyl mats only help with panel vibration.
Closed-Cell Foam and Mass-Loaded Vinyl for Airborne Noise
Engine roars, tire hisses, and highway ambiance travel through the air and through vibrating structures, usually demanding a layered approach.
Closed-cell foam (CCF): Creates a cushioning or decoupling layer between surfaces, prevents trim contact, and provides thermal insulation. It is not a substitute for a heavy sound-blocking barrier.
Mass-loaded vinyl (MLV): Adds considerable surface mass to block airborne sound passing through floors, bulkheads, and other appropriate surfaces.
Acoustic absorption materials: Certain open-cell foams and fibrous materials take sound energy out of cavities and reduce reflected noise.
For instance, to reduce engine noise on the doghouse or cab floor of a motorhome may need both damping of the vibrating panel plus a suitable sound barrier, possibly including a decoupling layer.
Check temperature ratings, fire safety, moisture resistance, clearance, as well as any applicability to your particular installation specified by the manufacturer. Do not block ventilation, wiring access, or service points and avoid interference with moving parts.
2. Eliminate Annoying Cabinet, Drawer, and Appliance Rattles
Interior rattles are usually the easiest RV noise issues to fix, no major mechanical work is needed.
Try these anti-rattle fixes:
Adhesive felt pads: Stick them to cabinet doors or drawer faces wherever they contact something that allows the rattling.
Silicone or friction tape: Use to cushion rubbing surfaces and stop repeated annoying squeaks.
Spring-loaded tension rods: Place small rods horizontally across pantry shelves to lock plates, cups, and canned goods tightly in place during transit.
Clear silicone bumpers: Stick small rubber dots under loose microwave turntables, stove burner grates, and range hood vents to silence high-pitched vibrations.
Bungee cords: Secure lightweight stored items in places where the manufacturer’s guidance permits.
You can also try cutting split foam pipe insulation and sliding it over brackets that support bunk ladder frames or slide-out fascias if there are irritating plastic-on-metal squeaks. Avoid using it on moving parts, where things could bind, or anywhere items need to be accessed.
These low-cost fixes can make a big difference before you buy new cabinets.
3. Seal Out Window, Door, and Slide-Out Wind Noise
A high-pitched whistling sound that grows louder at highway speeds almost always points to an air leak.
Inspect rubber weatherstripping: Check window weatherstripping, entry door seals, and slide-out seals for cracks, flattening, gaps, where the rubber has lost its rebound.
Clean and condition the seals: Clean the rubber with mild soap and water. Apply a silicone-based UV slide-out rubber conditioner to restore flexibility.
Replace degraded bulb seals: Swap out brittle or deformed gaskets with fresh, properly sized automotive or RV EPDM rubber seals.
Properly maintained seals can minimize wind noise, drafts, and unwanted penetration of dust. If the noise persists, ensure that the sound is not entering from another opening or resonating through an adjacent panel into the vehicle.
4. Quiet a Noisy Water Pump and Plumbing System
If you have a vibrating water pump, you can bet the cabinets will shake and resonate, making your RV sound louder.
Examine the pump’s mounting points and vibration-isolating mounts for any signs of loosening or damage. Look at easily visible water lines for rubbing against cabinet walls or other pipes.
If the plumbing manufacturer allows, adequate foam padding around the contact points of the pipes can prevent them from knocking against the hard surface. Do not cover the pump motor and restrict the ventilation required for cooling.
If the pump sounds excessive, look for worn mounts, loose fittings, or a mechanical issue. You can browse RV plumbing parts and fresh water pumps for replacements.
5. Upgrade Your Suspension to Tame Road Vibrations
Interior modifications won’t stop the chassis from shuddering over bridge expansion joints or rough asphalt. If your RV bounces all over after hitting bumps, the issue lies in your running gear.
Upgrade Blown or Factory Shock Absorbers
Factory RV shocks are often of not great quality and will wear out quickly when put under heavy loads. If they fail you will get constant up and down bouncing.
What to look for: Check for leaking hydraulic fluid coming out of the sides of the shock bodies, mounting eyelets for cracked or missing rubber bushings and cupping on your front tyres.
How to solve the problem: Fit heavy-duty, velocity-sensitive dampers (Bilstein or Koni) in place of the worn factory shocks. These respond instantly to any sudden road bumps and settle the chassis in a single stroke.
Add Anti-Sway Bars and Load-Support Upgrades
Anti-sway bars resist a vehicle from excessive body-rolling when taking a turn. Other suspension parts, like helper springs or air-support systems, handle other issues like sagging and load support.
Visit the RV Parts Center’s selection of suspension parts to find out what’s available. Select the right products to support your chassis and resolve the exact handling problems you are facing. Suspension components don’t add to the overall weight carrying capacity of a vehicle.
Side-to-side rocking and rear-end sag will transmit harsh torsion through the cabin of the vehicle and cause the internal components to loosen over time.
Heavy duty sway bars: Thicker front and rear sway bars will help keep the axle rigidly attached to the chassis, drastically reducing body roll when making sharp turns, driving in high crosswinds and when passing semi-truck turbulence.
Helper springs and Airbags: If the rear of your rig is sagging due to heavy gear, you can fit helper springs (such as SumoSprings) or an adjustable air suspension kit to help level the stance and prevent it from bottoming out against the bump stops.
Note: Upgraded springs and airbags level the vehicle and give a more stable ride. They will not increase your RV’s GVWR (Gross Vehicle Weight Rating) or axle load capacity).
Check out the range of Suspension Parts at RV Parts Center to find the correct sway bars, shocks and spring kits for your chassis.
6. Improve Handling With an RV Steering Stabilizer
If your motorhome wanders on the highway or needs frequent steering corrections, the problem may include tire condition, alignment, steering components, or road conditions.
A steering stabilizer uses a damping or spring-type mechanism to control undesirable steering movement. A steering stabilizer can help make steering responses in your vehicle and reduce the effect of grooves and irregularities in the road.
For example, the RV Parts Center’s Safe-T-Plus 41-140 steering stabilizer is listed for recommended applications for specific motorhomes and trucks. Always refer to the manufacturer’s application chart and your own vehicle fitment before ordering.
A steering stabilizer is a handling upgrade and not a fix for deteriorated steering parts, worn tires, or other component damage. Always address mechanical issues first.
7. Choose the Right Solution for Your RV
| Main problem |
Solution to investigate |
| Metallic panel resonance |
Butyl damping mat |
| Engine or tire noise entering the cabin |
Suitable sound barrier and layered insulation |
| Cabinet and fixture rattles |
Felt pads, silicone cushioning, and secure latches |
| Wind noise |
Weatherstripping and seal replacement |
| Water pump vibration |
Mounts and plumbing contact points |
| Excessive bouncing |
Shock absorbers and suspension condition |
| Body roll |
Compatible anti-sway bars |
| Steering wander |
Tires, alignment, steering components, and stabilizer |
8. Preventive Maintenance to Keep Cabin Noise Down
Periodic maintenance keeps minor noises from escalating into major annoyances. Make a quick sweep of your rig every few months:
Interior hardware: Make sure that window and door seals, loose cabinet hinges, readily accessible mounting hardware, drawer glides, accessible trim screws and suspension hardware are properly maintained according to the manufacturer’s maintenance schedule.
Seals and weatherstripping: The rubber seals on the doors and window gaskets should be cleaned with a mild soap & water solution. It is important to also condition the rubber to ensure it remains flexible and draft-free.
Chassis & Running Gear: Check the condition of the suspension bushes for dry rot, tighten the shock mounting bolts and check for any leaking of fluids from the dampers.
Pre-trip tire check: Always ensure that your tires are inflated correctly using a good quality cold tire pressure gauge. Using the weight rating of your loaded rig, you should always inflate your tires to the correct pressure. Under inflated tires will generate extra road noise, dangerous heat build up and poor handling characteristics.
If you ever experience sudden wobbles in the steering, violent shaking or loud clunking sounds while driving down the highway, pull over and check your running gear.
Final Thoughts: Make Your Next RV Journey Quieter With RV Parts Center
By identifying the source of your noise you can easily silence your RV. By using simple solutions such as lining your shelves, conditioning your door seals and adding sound deadening mats you can reduce the amount of noise inside your RV. If your rig is still bouncing and swaying you can upgrade your worn shocks and add anti-sway hardware to calm your chassis.
When you’re prepared to tackle chassis vibration and body roll, explore RV Parts Center’s suspension and stabilizing products to find parts engineered for your specific chassis and weight class. Find the right products to suit your chassis and weight class. Eliminate all the rattles and you can enjoy the open road.
Frequently Asked Questions on Reducing Noise and Vibrations Inside Your RV
How can I reduce noise and vibrations inside my RV?
Tighten up any loose parts, check that the seals are in good condition, use the right sound-deadening materials, and look over the tires and suspension for vibration issues.
Do butyl mats block engine noise?
Butyl mats work best on panels. To really tame airborne engine noise, you’ll probably need additional sound-deadening materials and to pay close attention to gaps and seals.
How do I stop RV cabinets from rattling?
Make sure all cabinet doors and drawers have the right tension or are properly latched. Then look for loose items, such as dishes, or use Velcro tape or felt pads to cushion the points of contact.
Why does my RV whistle while driving?
Worn window weatherstripping, gaps around entry doors, or slide-out seals allow wind noise into the cabin. Check seals for visible damage.
Will a steering stabilizer reduce interior noise?
It’ll help with the shuddering and thumping that can be transmitted through the front end. But it won’t address cabinet chatter, wind whistles, or road noise. See RV Parts Center’s steering stabilizers for options.
Why is my RV water pump so noisy?
Loose mounts, worn vibration isolators, or water lines rubbing against cabinet framing may cause excessive water pump noise. Check water pump mounting and water lines.
Will suspension upgrades make my RV quieter?
Suspension upgrades may help reduce noise caused by excessive bouncing or mechanical movement. But wind, engine, tire, or interior noises often require separate fixes.